Countdown timer widget
Every feature of the countdown timer, and when to use it.
A clock counting down to a sale, a launch, a daily order cut-off or each visitor's own deadline. Below is every feature in the four tabs, what it does and when it helps.
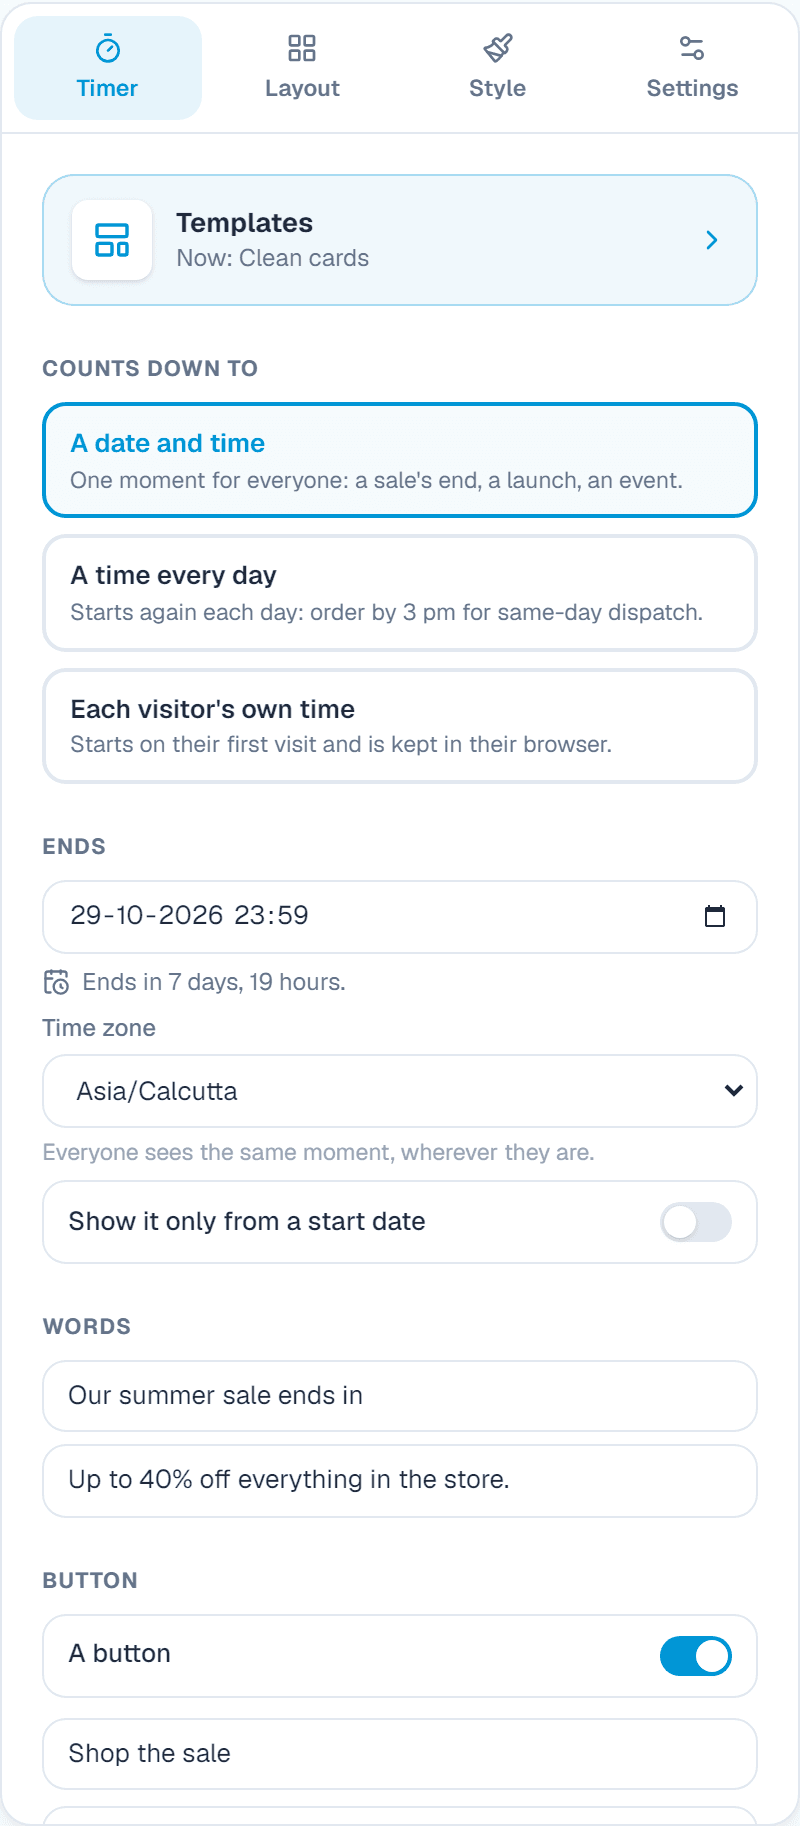
1. Timer
Templates
What it does: Ready-made designs at the top of the first tab. One click swaps the look and the example content; you then change the words.
When to use it: Start from a design that is close to what you want instead of an empty widget.
Counts down to a date
What it does: An end date and time, in a time zone you pick or each visitor's own clock, and an optional start date.
When to use it: A sale that ends at midnight on Sunday, or a launch.
Every day
What it does: Ends at the same time each day, on the days you pick; the next day's countdown starts at once.
When to use it: Order by 3 pm for same-day dispatch.
Each visitor
What it does: Each visitor gets their own few minutes, hours or days, starting on their first visit and running on when they come back.
When to use it: A welcome offer that's truly limited for each person.
Words
What it does: A heading, a line under it, a button with a link, and an Add to calendar link.
When to use it: Our summer sale ends in, with a Shop now button.
When the time is up
What it does: Show a message, hide the timer, keep it at zero, send visitors to a page, or start again.
When to use it: Send people to your next offer instead of showing zeros.
2. Layout
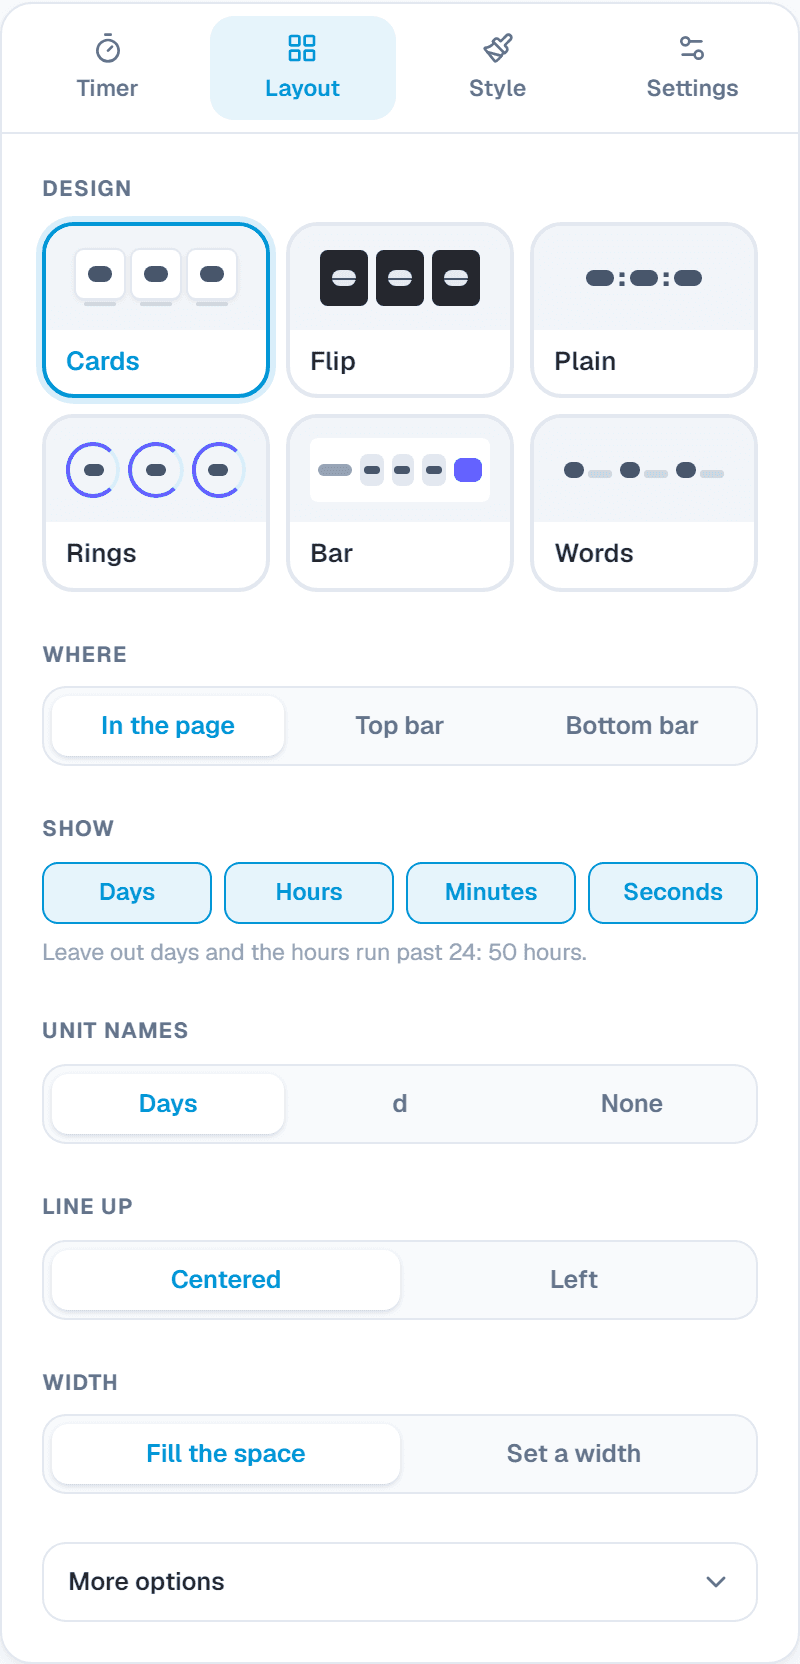
Design
What it does: Cards (each unit on a tile), Flip (dark tiles that flip), Plain (big digits), Rings (each unit in an emptying ring), Bar (one slim line with the button) or Words (3 days 4 hours, as a sentence).
When to use it: Flip for drama; Bar at the top of a page; Words in a sentence.
Where
What it does: In the page, or as a bar pinned to the top or bottom of the screen that visitors can close.
When to use it: A top bar keeps a sale in view on every page.
Units, names and line up
What it does: Which units show (leave out days and hours run past 24), short or long unit names or none, centred or left, and the spacing.
When to use it: Leave out days for a 48-hour offer: 47:59:10 feels urgent.
3. Style
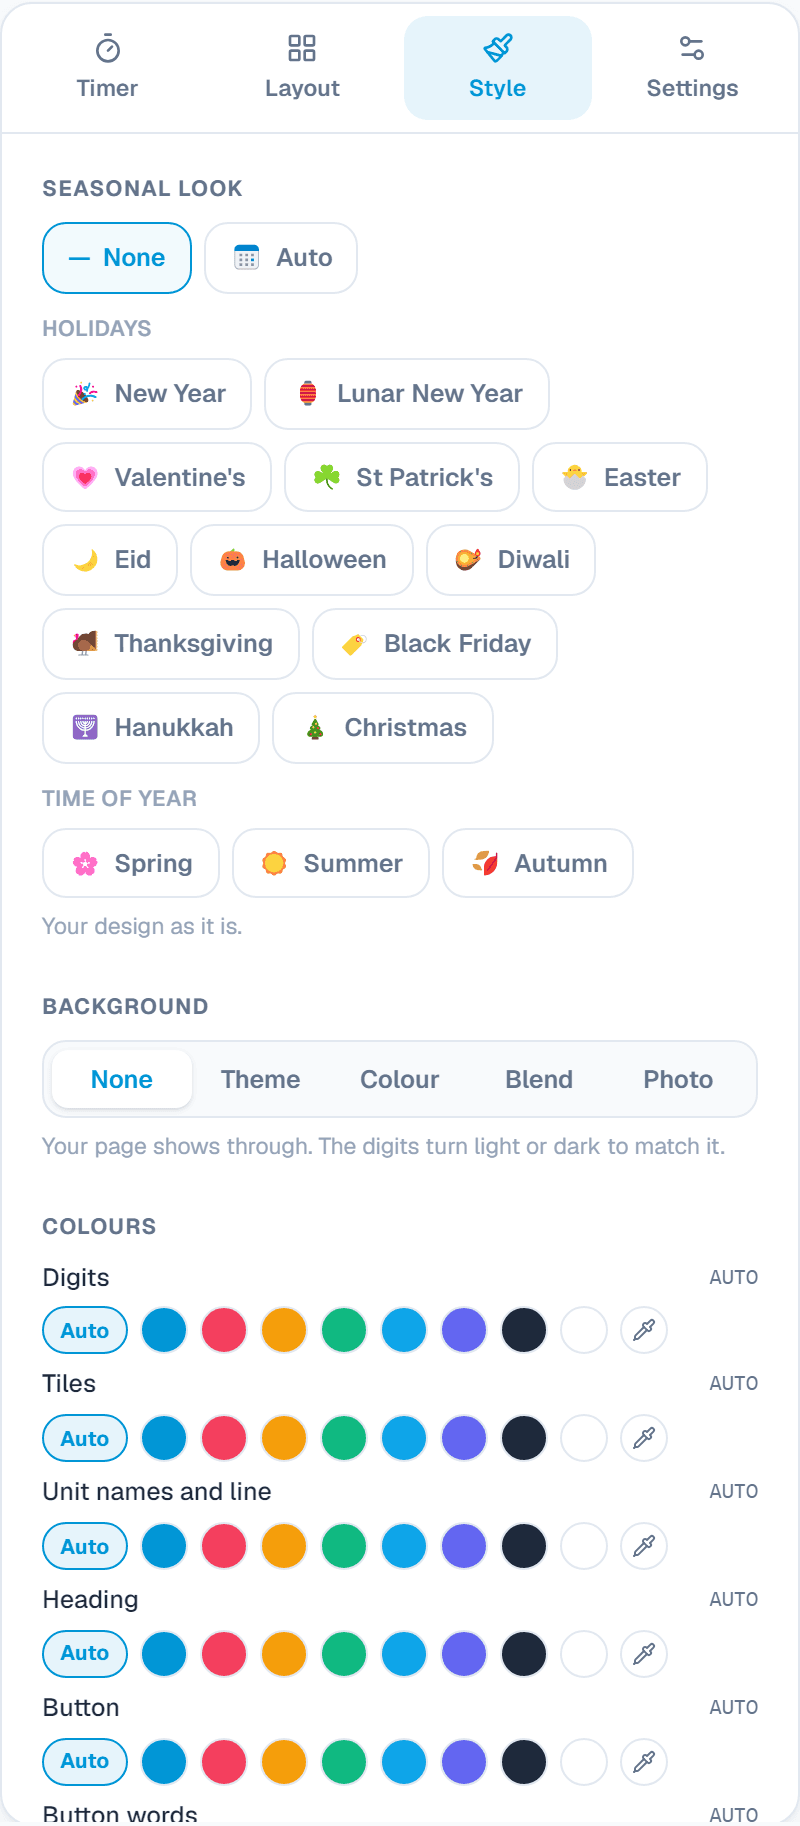
Colours
What it does: Digits, tiles, rings, unit names, heading, button and button words, and a background or photo.
When to use it: Bold digits in your brand colour.
Size and font
What it does: Small to extra large, your site's font, serif or mono, and exact sizes per device. A timer too wide for a phone shrinks by itself.
When to use it: Large on a sale page; small inside a banner.
Seasonal look
What it does: Small holiday touches on the widget: New Year, Lunar New Year, Valentine's, St Patrick's, Easter, Eid, Halloween and more. Auto switches on its own around each holiday.
When to use it: A friendly touch for a few weeks a year, without making a new design.
Settings: the link and your own CSS
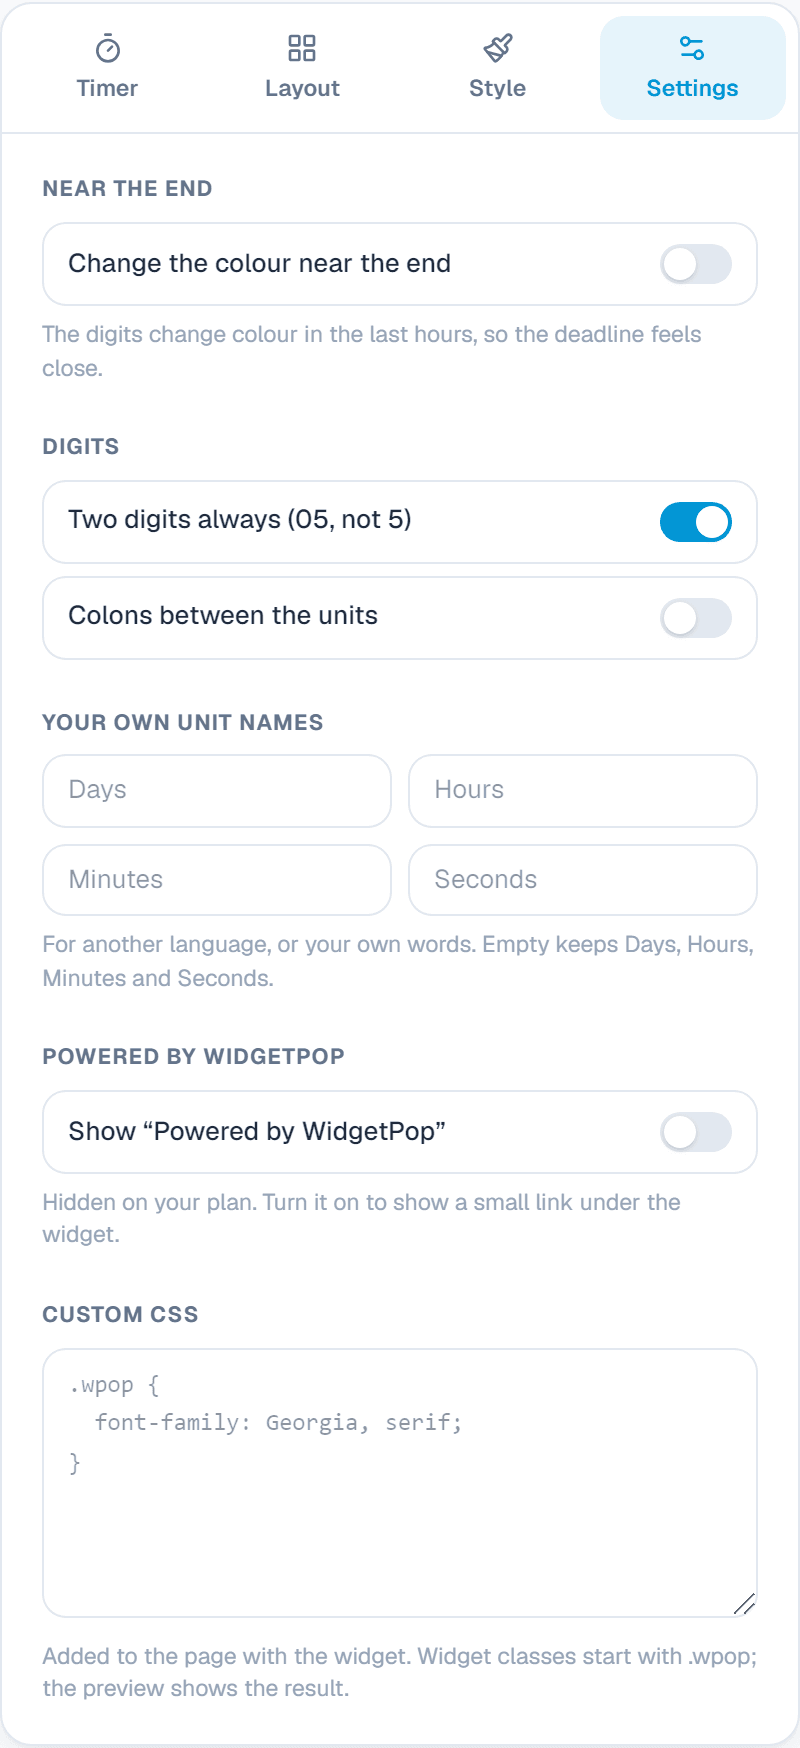
Near the end
What it does: The digits change colour in the last hours.
When to use it: Makes the deadline feel close: red in the last 2 hours.
Digits
What it does: Always two digits (05, not 5), and colons between the units.
When to use it: Two digits stop the timer jumping in width.
Your own unit names
What it does: Your own words for days, hours, minutes and seconds.
When to use it: For another language, or Tage, Stunden in German.
Powered by WidgetPop
What it does: A small link under the widget. The Free plan always shows it; on a paid plan it is hidden unless you turn it on.
When to use it: Keep it hidden on a paid plan so the widget carries only your brand.
Custom CSSPaid plans
What it does: Your own CSS rules for this widget. Its classes start with .wpop, and the preview shows the result.
When to use it: For designers who need an exact font, size or spacing that the editor doesn't offer.
Add it to your website
In the Install tab, add your website's address under Allow your website, copy the code and paste it where the widget should appear. Every change you save shows on your site by itself.
About this widget
Related guides
Still need help?
Tell us what you're trying to do. A real person replies, usually within one working day.